This Site Is A Special Thank You & Introduction To Some Outstanding Men & Women!

What's Your Definition Of Greatness? "To own your story and love yourself through that process." Brene Brown
"Your story should not be your fortress but rather your fuel." - Lisa Nichols
"The way to get started is to quit talking and begin doing." -Walt Disney
"When you reach the end of your rope, tie a knot in it and hang on." -Franklin D. Roosevelt
"Don't judge each day by the harvest you reap but by the seeds that you plant." -Robert Louis Stevenson
Dreams grow if you grow. Zig Ziglar
"Do not go where the path may lead, go instead where there is no path and leave a trail." -Ralph Waldo Emerson
"The greatest glory in living lies not in never falling, but in rising every time we fall." -Nelson Mandela
"In the end, it's not the years in your life that count. It's the life in your years." -Abraham Lincoln
"Life is a succession of lessons which must be lived to be understood." -Ralph Waldo Emerson
"The only impossible journey is the one you never begin." -Tony Robbins
"Love the life you live. Live the life you love." -Bob Marley
"Life is either a daring adventure or nothing at all." -Helen Keller
If you judge people, you have no time to love them. Mother Teresa
All that we are is the result of what we have thought. Buddha
Stay hungry, stay foolish. Steve Jobs
The future belongs to those who prepare for it today. Malcolm X
Some people do really find fault like there's a reward for it. Zig Ziglar
It always seems impossible until it’s done. Nelson Mandela
Turn your wounds into wisdom. Oprah Winfrey
Whatever you are, be a good one. Abraham Lincoln
Do what you can, with what you have, where you are. Theodore Roosevelt
Little by little, one travels far. J.R.R. Tolkien
I fear not the man who has practiced 10,000 kicks once, but I fear the man who has practiced one kick 10,000 times. Bruce Lee
A man who stands for nothing will fall for anything. Malcolm X
You have power over your mind – not outside events. Realize this, and you will find strength. Marcus Aurelius
By failing to prepare, you are preparing to fail. Benjamin Franklin
I think, therefore I am. René Descartes
To be, or not to be, that is the question. William Shakespeare
A lot of people quit looking for work as soon as they find a job. Zig Ziglar
Live life like your the hero in the story.
Previous slide
Next slide

How to gut and prepare animals for food

How to Gut and Prepare Animals for Food: A Step-by-Step Guide

How to Gut and Prepare Animals for Food: A Step-by-Step Guide

Gutting and preparing animals for food is a skill that has been passed down through generations and is essential for hunters, homesteaders, and anyone interested in sourcing their own food. Here’s a step-by-step guide to gutting and preparing animals for consumption:

1. Gather Your Tools

Before you begin, ensure you have all the necessary tools and equipment:

  • Sharp knife or boning knife
  • Gutting hook or gutting gloves (optional)
  • Cutting board
  • Clean water for rinsing
  • Coolers or refrigeration for storing meat

2. Properly Dispose of Waste

Choose a suitable location away from water sources and other food prep areas to gut the animal. This prevents contamination and ensures proper disposal of waste. Consider composting or burying the remains if possible.

3. Prepare the Animal

Lay the animal on its back or side, ensuring it is secure and stable. Use ropes or straps to keep it in place if necessary. Take care to avoid damaging the meat while handling the carcass.

4. Make the Initial Incision

Using a sharp knife, make a shallow incision from the base of the rib cage to the pelvic bone, being careful not to puncture the intestines or other organs. This allows you to access the internal cavity of the animal.

5. Remove the Internal Organs

Carefully reach into the cavity and gently pull out the internal organs, including the intestines, stomach, liver, and lungs. Be cautious not to puncture or rupture any organs, as this can contaminate the meat.

6. Rinse and Clean

Once the internal organs are removed, rinse the cavity thoroughly with clean water to remove any blood, debris, or remaining organ tissues. Use a hose or bucket to flush out the cavity, ensuring it is clean and free of contaminants.

7. Inspect the Meat

Inspect the meat for any signs of damage, spoilage, or contamination. Remove any visible blood clots, hair, or foreign objects from the surface of the meat. Trim away any bruised or discolored areas to ensure the quality of the meat.

8. Store the Meat Properly

After gutting and cleaning the animal, it’s essential to store the meat properly to prevent spoilage. Place the meat in coolers or refrigeration to keep it chilled until you’re ready to cook or process it further. If you’re unable to refrigerate the meat immediately, consider packing it in ice or using a portable cooler to keep it cold.

9. Cook and Enjoy

Once the meat is properly prepared and stored, you’re ready to cook and enjoy it! Whether you’re grilling, roasting, or stewing the meat, take pride in knowing that you’ve sourced and prepared your own food from start to finish.

10. Practice Food Safety

Throughout the gutting and preparation process, it’s essential to prioritize food safety and hygiene. Wash your hands and tools thoroughly with soap and water before and after handling the animal, and avoid cross-contamination with other food items.

By following these steps, you can safely and effectively gut and prepare animals for food, ensuring the quality and safety of the meat for consumption. Whether you’re a seasoned hunter or a novice homesteader, mastering this skill allows you to take control of your food supply and enjoy the rewards of self-sufficiency.

How to build a snare & trap small animals

Survival Skills: How to Build Snares and Traps for Small Animals

Introduction

In a survival situation, knowing how to procure food can be essential for your survival. Building snares and traps for small animals is a valuable skill that can help you secure a source of sustenance when other options are scarce. In this guide, we’ll explore the basics of building snares and traps for small animals, providing you with the knowledge you need to increase your chances of survival in the wilderness.

Understanding Snares and Traps

Before delving into the specifics of building snares and traps, it’s important to understand the principles behind them. Snares are designed to capture animals by noose or entanglement, while traps are mechanisms that immobilize or kill animals when triggered. Both snares and traps can be effective methods for catching small game such as rabbits, squirrels, and birds.

Choosing the Right Location

Selecting the right location for your snares and traps is crucial for maximizing your chances of success. Look for areas with signs of animal activity, such as game trails, burrows, or feeding areas. Additionally, consider factors such as camouflage and concealment to minimize the chances of your snares and traps being detected by wary prey.

Building a Simple Snare

One of the simplest and most effective types of snares is the basic snare loop. To build a basic snare, you’ll need a length of wire or cordage, a sturdy branch or stake, and a trigger mechanism. Form a small loop at one end of the wire and secure it to the branch or stake. Position the loop along a game trail or near a den entrance, and set the trigger mechanism so that it will release the loop when disturbed by an animal.

Constructing a Figure-4 Deadfall Trap

Another effective trapping method is the figure-4 deadfall trap, which relies on a weighted object to crush prey when triggered. To build a figure-4 deadfall trap, fashion three sticks into the shape of a figure-4, with the bait stick serving as the trigger. Prop up the weighted object (such as a large rock or log) with the figure-4 mechanism, ensuring that it will fall when the trigger stick is disturbed by an animal.

Ensuring Humane Capture

It’s important to prioritize humane capture when building snares and traps for small animals. Check your snares and traps frequently to minimize the suffering of captured animals, and use caution when handling live prey. Remember that trapping is a means of survival, and treat captured animals with respect and gratitude for the sustenance they provide.

Conclusion

Building snares and traps for small animals is a valuable skill that can enhance your ability to survive in the wilderness. By understanding the principles behind snares and traps, selecting the right location, and constructing effective devices, you can increase your chances of securing a vital source of food in a survival situation. Practice your trapping skills regularly and approach the task with patience and persistence, and you’ll be better prepared to thrive in the wild.

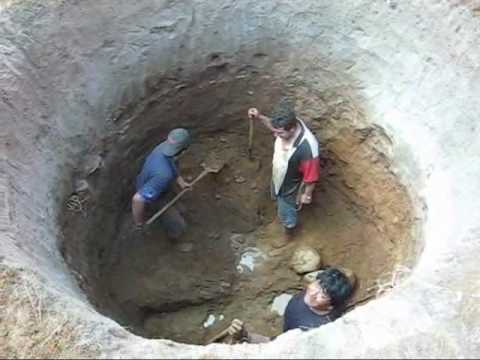
How to dig a water well

How To Dig A Water Well: A Step-by-Step Guide

Digging a water well is a crucial skill, especially for those living in rural areas or off-grid locations where access to municipal water is limited or nonexistent. While it may seem like a daunting task, with the right tools, knowledge, and preparation, you can successfully dig your own water well. Follow these steps to ensure a safe and efficient well-digging process:

1. Obtain Necessary Permits and Permissions

Before you begin digging, it’s essential to check with local authorities to obtain any required permits and permissions. Regulations regarding well digging vary by location, so make sure you’re in compliance with local laws and regulations.

2. Choose the Location

Selecting the right location for your well is critical. Look for an area where the ground is relatively flat and free from potential contaminants such as septic tanks or chemical storage areas. It’s also essential to consider the distance from sources of pollution, such as livestock areas or industrial sites.

3. Gather the Required Tools and Equipment

To dig a water well, you’ll need the following tools and equipment:

  • A sturdy shovel or spade
  • A digging bar or post hole digger
  • A well drilling rig or auger
  • PVC casing pipes
  • Gravel or coarse sand
  • Well screen
  • Hand pump or electric pump (optional)

Ensure that all your equipment is in good working condition before you begin.

4. Start Digging

Once you’ve chosen the location and gathered your tools, it’s time to start digging. Use a shovel or spade to dig a pilot hole approximately three to four feet deep. This will serve as the starting point for your well.

5. Use a Drilling Rig or Auger

After digging the pilot hole, you’ll need to use a well drilling rig or auger to continue digging deeper into the ground. Follow the manufacturer’s instructions for operating the drilling rig or auger safely.

6. Install PVC Casing Pipes

As you dig deeper, it’s crucial to install PVC casing pipes to prevent the well from collapsing. Lower the casing pipes into the hole as you dig, making sure to secure them in place with gravel or coarse sand.

7. Install the Well Screen

Once you’ve reached the desired depth, install the well screen at the bottom of the casing pipes. The well screen will prevent sediment and debris from entering the well while allowing water to flow freely.

8. Backfill the Well

After installing the well screen, backfill the well with gravel or coarse sand to provide additional support and stability.

9. Test the Well

Once the well is complete, it’s essential to test the water quality to ensure that it’s safe for consumption. You can do this by hiring a professional to conduct water quality tests or using DIY water testing kits.

10. Install a Pump (Optional)

If you plan to use the well for drinking water or irrigation, you’ll need to install a pump to extract water from the well. Choose a hand pump or electric pump based on your needs and budget.

Conclusion

Digging a water well may seem like a daunting task, but with proper planning, preparation, and the right tools, it’s entirely achievable. By following these steps, you can dig your own water well and enjoy access to clean, fresh water for years to come. Remember to prioritize safety at all times and consult with experts if you encounter any challenges along the way.

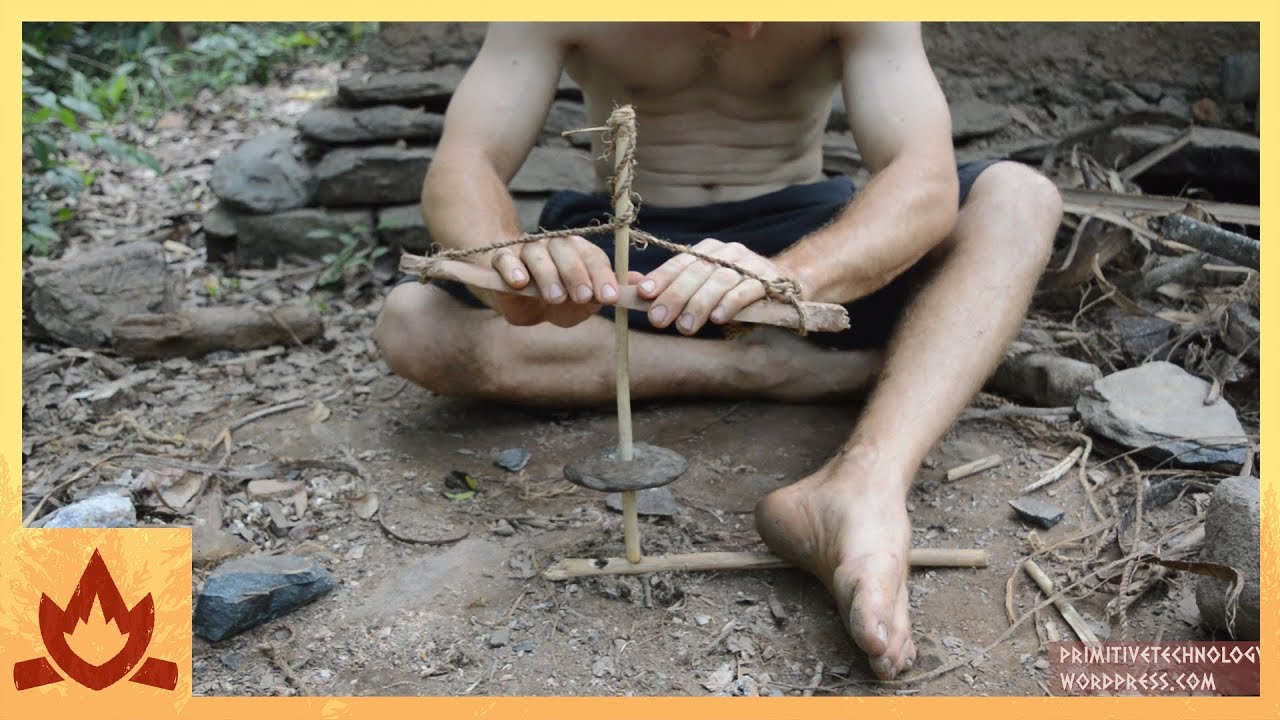
How to make fire

Discover Fire Making Tips & Tricks:

Making fire is a fundamental survival skill that has been practiced by humans for thousands of years. Here’s a basic guide on how to make fire using various methods:

1. Friction Method:

  • Bow Drill: Construct a bow using a curved stick and a length of cord. Create a spindle by sharpening one end of a straight stick. Place a flat piece of wood (the fireboard) on the ground and carve a small notch near the edge. Loop the cord around the spindle and wrap it around the bow. Place the spindle in the notch on the fireboard, apply downward pressure, and rapidly move the bow back and forth to rotate the spindle. The friction generated will create heat, eventually igniting the tinder.

  • Hand Drill: Similar to the bow drill, but instead of using a bow, rotate the spindle between your palms. Apply downward pressure and rapidly rotate the spindle against the fireboard to generate friction.

2. Flint and Steel Method:

  • Gather a piece of flint or other hard rock and a piece of high-carbon steel, such as a knife blade or a striker specifically designed for fire starting.
  • Hold the flint firmly in one hand and strike the steel against it at a sharp angle, directing the sparks onto a piece of char cloth or tinder fungus held in your other hand.
  • The impact of the steel against the flint will create sparks, which can be directed onto the tinder to ignite it.

3. Solar Method:

  • On a sunny day, focus sunlight through a convex lens, such as a magnifying glass or the lens of a camera, onto a piece of tinder.
  • Adjust the angle and distance of the lens until the concentrated sunlight forms a small, intense spot on the tinder, eventually causing it to smolder and ignite.

4. Chemical Reaction Method:

  • Combine two or more chemicals that react exothermically to produce heat and ignite tinder. Common chemical fire starters include potassium permanganate and glycerin, or a mixture of potassium chlorate and sugar.
  • Exercise caution when handling chemicals and follow safety instructions carefully to avoid accidents.

5. Electrical Method:

  • Use a battery and steel wool to create a short circuit, generating heat and igniting the steel wool. This method is particularly effective in dry conditions and can be a quick way to start a fire in an emergency.

Regardless of the method you choose, always exercise caution and follow safety guidelines when making fire, especially in wilderness or outdoor settings. Ensure you have proper tinder, kindling, and firewood ready before attempting to ignite a fire, and always have a means of extinguishing the fire readily available. Practice your fire-making skills regularly to maintain proficiency and confidence in various conditions.

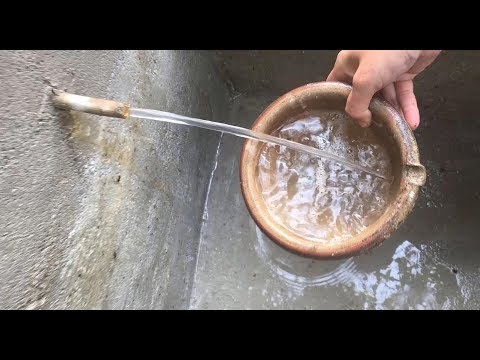
How to purify water

Discover How To Clean Water For Drinking:

Purifying water is essential for ensuring its safety for drinking and other uses, especially in situations where clean water sources are unavailable or contaminated. Here are several methods for purifying water:

1. Boiling:

  • Bring the water to a rolling boil in a pot or kettle.
  • Allow the water to boil for at least one minute (or three minutes at higher altitudes) to kill bacteria, viruses, and parasites.
  • Let the water cool before drinking or storing.

2. Filtration:

  • Use a portable water filter or filtration system designed to remove contaminants such as bacteria, protozoa, and sediment.
  • Follow the manufacturer’s instructions for proper use and maintenance of the filter.
  • Replace filter cartridges or components as recommended to ensure effectiveness.

3. Chemical Treatment:

  • Chlorine or iodine tablets can be used to disinfect water and kill harmful microorganisms.
  • Follow the instructions on the product packaging for dosage and contact time.
  • Allow the treated water to stand for the specified period to ensure thorough disinfection.

4. Ultraviolet (UV) Light:

  • UV water purifiers use ultraviolet light to kill bacteria, viruses, and other pathogens present in water.
  • Place the UV light source in the water container and activate it according to the manufacturer’s instructions.
  • Ensure that the water is clear and free of sediment to allow the UV light to penetrate effectively.

5. Distillation:

  • Boil the water to produce steam, then collect and condense the steam to form purified water.
  • Distillation removes contaminants such as heavy metals, chemicals, and microbes by separating them from the water vapor.
  • This method requires specialized equipment, such as a distillation apparatus or solar still.

6. Reverse Osmosis:

  • Reverse osmosis systems use a semi-permeable membrane to remove contaminants from water through a process of filtration.
  • Water is forced through the membrane under pressure, leaving behind impurities and producing purified water.
  • Reverse osmosis systems are commonly used for home water treatment and can remove a wide range of contaminants.

7. Natural Methods:

  • In emergencies or outdoor settings, natural purification methods such as solar disinfection (SODIS) or using natural filtration materials like sand and gravel can help remove sediment and some contaminants from water.
  • These methods may not be as effective as other purification techniques but can provide a basic level of water treatment in certain situations.

When purifying water, it’s important to consider the specific contaminants present and the effectiveness of each purification method in removing them. Additionally, always ensure that containers and utensils used for collecting, storing, and treating water are clean and sanitized to prevent contamination. Regularly test treated water for safety to ensure that purification methods are working effectively.

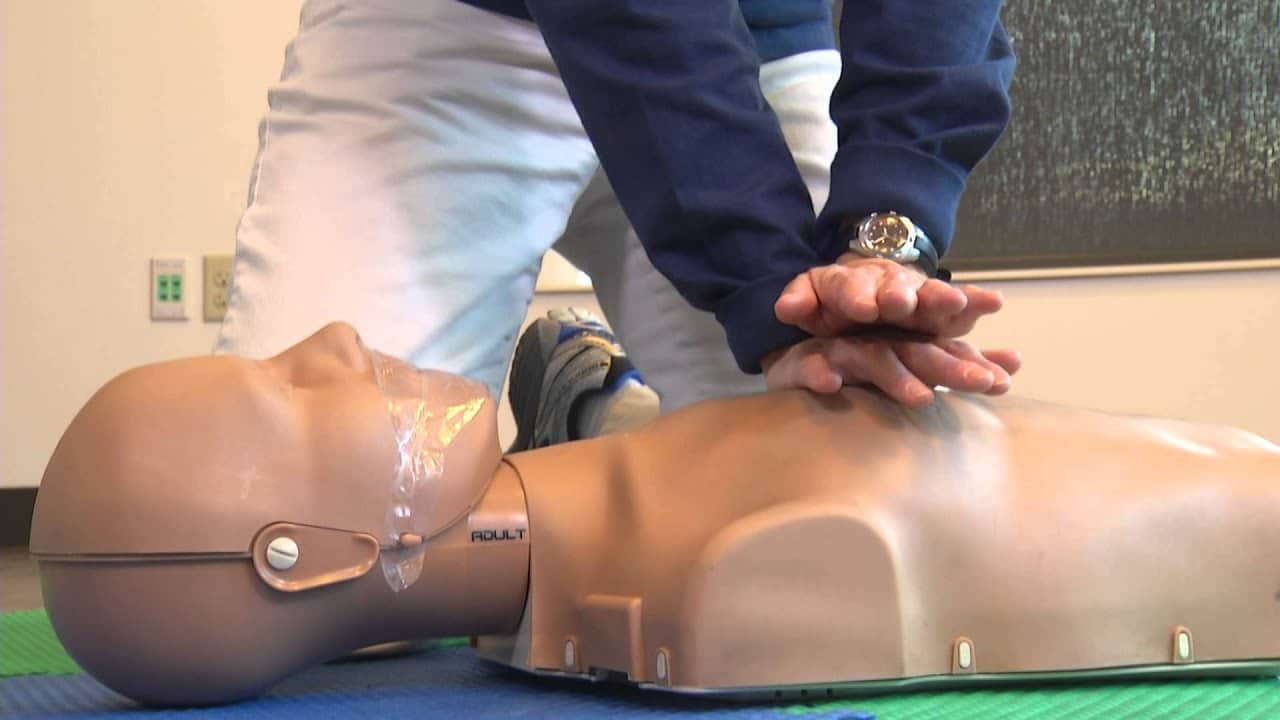
Learn CPR

Discover CPR Tutorials & Consider Getting Certified:

Learning CPR (Cardiopulmonary Resuscitation) is a valuable skill that can potentially save lives in emergency situations. Here’s a basic guide to learning CPR:

  1. Find a CPR Course: The first step in learning CPR is to find a certified CPR training course in your area. Many organizations offer CPR certification classes, including the American Red Cross, the American Heart Association, and local community centers. You can typically find courses for both healthcare professionals and laypersons.

  2. Choose the Right Course: Depending on your needs and interests, you can choose from different types of CPR courses. Basic CPR courses typically cover adult, child, and infant CPR techniques, as well as how to use an automated external defibrillator (AED). Advanced courses may include additional training in first aid, choking relief, and CPR for healthcare providers.

  3. Attend the Training: Once you’ve found a course that suits your needs, sign up and attend the training session. CPR courses typically combine hands-on practice with instructional videos, lectures, and demonstrations. Be prepared to actively participate in skill drills and scenarios to reinforce your learning.

  4. Learn the Steps: During the CPR training, you’ll learn the basic steps of CPR, which typically include:

    • Assessment: Check the scene for safety and assess the victim for responsiveness. Tap the person’s shoulder and shout, “Are you okay?”
    • Call for Help: If the victim is unresponsive, call for emergency medical assistance (911 or your local emergency number) immediately.
    • Check for Breathing: Tilt the victim’s head back, lift the chin, and look, listen, and feel for signs of breathing for no more than 10 seconds.
    • Perform Chest Compressions: If the victim is not breathing or only gasping, begin chest compressions by placing the heel of one hand on the center of the victim’s chest (between the nipples) and interlocking the other hand on top. Push hard and fast at a rate of about 100 to 120 compressions per minute, allowing the chest to fully recoil between compressions.
    • Give Rescue Breaths (if trained): If you’re trained in CPR with rescue breaths, give two breaths after every 30 compressions. Ensure proper head tilt and chin lift before giving breaths.
  5. Practice Regularly: CPR is a skill that requires practice to maintain proficiency. Even after completing a CPR course and obtaining certification, it’s essential to review and refresh your skills regularly. Consider attending refresher courses or participating in practice sessions to stay prepared for emergencies.

  6. Stay Informed: Stay informed about updates and changes in CPR guidelines and techniques. CPR protocols may evolve over time based on new research and evidence, so it’s essential to stay up-to-date with the latest recommendations from reputable organizations like the American Heart Association.

By learning CPR, you’ll be equipped with the knowledge and skills to respond effectively in life-threatening situations, potentially making a difference in someone’s survival outcome. Remember, every second counts in a cardiac emergency, so don’t hesitate to take action and administer CPR if needed.

Firefighting – How to escape & put out fire

Fire Safety Essentials: How to Escape and Put Out Fires


Introduction

In the event of a fire, knowing how to escape safely and effectively can mean the difference between life and death. Additionally, understanding how to extinguish small fires before they escalate can help prevent property damage and save lives. In this guide, we’ll explore essential tips and techniques for escaping from fires and putting them out safely.

Escaping From Fires

  1. Stay Calm and Assess the Situation: If you discover a fire, remain calm and quickly assess the situation. Determine the location and size of the fire, as well as the nearest exits.

  2. Alert Others: If possible, alert others in the vicinity of the fire by shouting “Fire!” and activating the nearest fire alarm. Warn them to evacuate immediately and avoid using elevators.

  3. Find the Nearest Exit: Identify the nearest exit and evacuate the building as quickly and safely as possible. If the primary exit is blocked by fire or smoke, use an alternate route, such as a secondary exit or window.

  4. Crawl Low Under Smoke: If smoke is present, stay close to the ground where the air is clearer and crawl to the nearest exit. Cover your nose and mouth with a cloth to reduce smoke inhalation.

  5. Close Doors Behind You: As you evacuate, close doors behind you to slow the spread of fire and smoke. This can help contain the fire and prevent it from spreading to other areas of the building.

Putting Out Fires

  1. Assess the Situation: Before attempting to extinguish a fire, assess the size and severity of the blaze. If the fire is small and contained, you may be able to extinguish it safely using appropriate firefighting equipment.

  2. Use the Correct Fire Extinguisher: Different types of fires require different types of extinguishers. Familiarize yourself with the various classes of fire (e.g., Class A, B, C, D, and K) and use the appropriate extinguisher for the type of fire you’re dealing with.

  3. Remember the PASS Technique: When using a fire extinguisher, remember the PASS technique:

    • Pull the pin to unlock the extinguisher.
    • Aim the nozzle at the base of the fire.
    • Squeeze the handle to discharge the extinguishing agent.
    • Sweep the nozzle from side to side to cover the entire fire area.
  4. Maintain a Safe Distance: Stand at a safe distance from the fire and avoid inhaling smoke or toxic fumes. If the fire continues to grow or spread, evacuate the area immediately and call emergency services.

Conclusion

Escaping from fires and putting them out safely are essential skills that everyone should know. By staying calm, assessing the situation, and following these tips and techniques, you can increase your chances of escaping from fires unharmed and preventing small fires from escalating. Remember to prioritize safety at all times and seek assistance from trained professionals if necessary. With proper preparation and knowledge, you can protect yourself and others from the dangers of fires and ensure a safe environment for all.