This Site Is A Special Thank You & Introduction To Some Outstanding Men & Women!

What's Your Definition Of Greatness? "To own your story and love yourself through that process." Brene Brown
"Your story should not be your fortress but rather your fuel." - Lisa Nichols
"The way to get started is to quit talking and begin doing." -Walt Disney
"When you reach the end of your rope, tie a knot in it and hang on." -Franklin D. Roosevelt
"Don't judge each day by the harvest you reap but by the seeds that you plant." -Robert Louis Stevenson
Dreams grow if you grow. Zig Ziglar
"Do not go where the path may lead, go instead where there is no path and leave a trail." -Ralph Waldo Emerson
"The greatest glory in living lies not in never falling, but in rising every time we fall." -Nelson Mandela
"In the end, it's not the years in your life that count. It's the life in your years." -Abraham Lincoln
"Life is a succession of lessons which must be lived to be understood." -Ralph Waldo Emerson
"The only impossible journey is the one you never begin." -Tony Robbins
"Love the life you live. Live the life you love." -Bob Marley
"Life is either a daring adventure or nothing at all." -Helen Keller
If you judge people, you have no time to love them. Mother Teresa
All that we are is the result of what we have thought. Buddha
Stay hungry, stay foolish. Steve Jobs
The future belongs to those who prepare for it today. Malcolm X
Some people do really find fault like there's a reward for it. Zig Ziglar
It always seems impossible until it’s done. Nelson Mandela
Turn your wounds into wisdom. Oprah Winfrey
Whatever you are, be a good one. Abraham Lincoln
Do what you can, with what you have, where you are. Theodore Roosevelt
Little by little, one travels far. J.R.R. Tolkien
I fear not the man who has practiced 10,000 kicks once, but I fear the man who has practiced one kick 10,000 times. Bruce Lee
A man who stands for nothing will fall for anything. Malcolm X
You have power over your mind – not outside events. Realize this, and you will find strength. Marcus Aurelius
By failing to prepare, you are preparing to fail. Benjamin Franklin
I think, therefore I am. René Descartes
To be, or not to be, that is the question. William Shakespeare
A lot of people quit looking for work as soon as they find a job. Zig Ziglar
Live life like your the hero in the story.
Previous slide
Next slide

Heroes – Paul Cary (Paramedic 2020)

Honoring Heroes: The Courageous Story of Paul Cary, Paramedic (2020)

Introduction

In times of crisis and uncertainty, heroes emerge to selflessly serve and protect their communities. Paul Cary, a paramedic from Aurora, Colorado, exemplified the true spirit of heroism during the unprecedented challenges of 2020. His unwavering dedication to saving lives and providing critical medical care amidst the COVID-19 pandemic touched the hearts of many and left a lasting legacy of courage and compassion.

A Paramedic’s Call to Duty

As the COVID-19 pandemic swept across the globe, frontline healthcare workers found themselves on the front lines of the battle against the deadly virus. Paul Cary, a seasoned paramedic with decades of experience, answered the call to duty without hesitation. Despite the risks to his own health and safety, Cary volunteered to join a deployment of paramedics from Colorado to New York City, the epicenter of the pandemic in the United States.

Selfless Service in the Face of Adversity

Throughout his deployment in New York City, Paul Cary worked tirelessly alongside fellow paramedics to provide critical medical care to patients battling COVID-19. Day and night, he braved the chaos and uncertainty of overwhelmed hospitals and overwhelmed medical systems, demonstrating unwavering dedication and compassion in the face of adversity.

A Tragic Loss and Enduring Legacy

Tragically, Paul Cary’s selfless service came to a sudden and heartbreaking end when he succumbed to complications of COVID-19 while on deployment in New York City. His passing sent shockwaves through the paramedic community and beyond, leaving a profound impact on all who knew him. Despite the immense loss, Cary’s legacy of heroism and selflessness lives on as a testament to the power of compassion and the indomitable spirit of the human heart.

Honoring Paul Cary’s Memory

Paul Cary’s courageous actions and ultimate sacrifice serve as a reminder of the extraordinary courage and dedication exhibited by frontline healthcare workers around the world. As we honor his memory, let us also recognize and express gratitude to all those who continue to serve on the front lines of the COVID-19 pandemic, risking their own health and safety to save lives and protect communities.

Conclusion

Paul Cary, a paramedic from Aurora, Colorado, embodied the true spirit of heroism through his selfless service and unwavering dedication to helping others in need. His courage, compassion, and sacrifice serve as a beacon of hope and inspiration for all, reminding us of the profound impact that one individual can make in the lives of others. As we reflect on his legacy, let us strive to emulate his spirit of service and kindness, and honor his memory by continuing to support and uplift those in need.

Guga Foods

Guga Foods: A Culinary Adventure of Flavor and Passion

Guga Foods is not just a YouTube channel; it’s a culinary journey that celebrates the art of grilling, smoking, and exploring the endless possibilities of flavor. Led by the charismatic host Guga Rocha, this channel has captured the hearts and taste buds of millions of food enthusiasts around the world with its mouthwatering recipes, innovative cooking techniques, and unwavering passion for all things barbecue.

The Man Behind the Grill: Guga Rocha

At the helm of Guga Foods is Guga Rocha, a Brazilian-born chef and grill master whose infectious enthusiasm and love for cooking have made him a beloved figure in the world of food media. With his charming personality, expert culinary skills, and insatiable curiosity, Guga inspires viewers to embark on a flavorful journey of discovery, one delicious recipe at a time.

Exploring the Art of Barbecue

Guga Foods is a paradise for barbecue aficionados, offering a treasure trove of recipes, tips, and tricks for mastering the grill. From perfectly seared steaks and juicy burgers to tender ribs and succulent seafood, Guga demonstrates the art of barbecue with finesse and creativity, turning ordinary ingredients into extraordinary culinary delights.

Innovative Techniques and Experiments

What sets Guga Foods apart is its willingness to push the boundaries of traditional barbecue and explore new culinary frontiers. Whether it’s dry-aging steak in butter, smoking a whole alligator, or grilling Wagyu beef over hot lava rocks, Guga fearlessly experiments with flavors, techniques, and ingredients, inspiring viewers to unleash their creativity and elevate their cooking to new heights.

A Global Community of Food Lovers

Guga Foods is more than just a YouTube channel; it’s a vibrant community of food lovers from all walks of life, united by their shared passion for great food and great company. Through engaging videos, live streams, and interactive social media platforms, Guga fosters a sense of camaraderie and connection among his viewers, inviting them to join him on a culinary adventure of epic proportions.

From Grill to Table: Bringing People Together

At its core, Guga Foods is about more than just cooking; it’s about bringing people together, forging connections, and creating unforgettable memories around the dinner table. Whether it’s a backyard barbecue with friends, a family cookout, or a festive feast for a special occasion, Guga’s recipes inspire moments of joy, laughter, and celebration shared with loved ones.

Conclusion: A Flavorful Feast for the Senses

Guga Foods is more than just a YouTube channel; it’s a culinary experience that tantalizes the taste buds, ignites the imagination, and brings people together in the spirit of good food and good company. With its mouthwatering recipes, innovative techniques, and infectious enthusiasm, Guga Foods invites viewers to savor the flavors of life and embark on a delicious journey of discovery, one bite at a time.

Cheeseburger Recipes

Elevate Your Burger Game: Delicious Cheeseburger Recipes for Every Palate

Few dishes evoke the same level of universal satisfaction as a juicy, flavorful cheeseburger. Whether you prefer yours classic and simple or loaded with gourmet toppings, there’s a cheeseburger recipe out there to satisfy every craving. In this article, we’ll explore several mouthwatering ways to cook a burger, guaranteed to elevate your burger game and delight your taste buds.

1. Classic Beef Cheeseburger

Let’s start with the timeless classic – the beef cheeseburger. For this recipe, you’ll need high-quality ground beef, seasoned with salt and pepper to taste. Shape the beef into patties and grill or pan-fry them to your desired level of doneness. Top with your favorite cheese – cheddar, American, or Swiss – and let it melt deliciously over the hot patty. Serve on a toasted bun with crisp lettuce, juicy tomato slices, and tangy pickles for the quintessential cheeseburger experience.

2. Gourmet Blue Cheese Burger

For a sophisticated twist on the traditional cheeseburger, try a gourmet blue cheese burger. Start with the same seasoned beef patties as the classic recipe, but instead of your usual cheese, opt for crumbled blue cheese. Grill the patties to perfection, allowing the blue cheese to melt and mingle with the savory beef. Serve on a toasted brioche bun with caramelized onions, arugula, and a drizzle of balsamic glaze for an unforgettable flavor combination.

3. Turkey Avocado Burger

Looking for a lighter option without sacrificing flavor? Enter the turkey avocado burger. Mix lean ground turkey with chopped fresh herbs, garlic, and a hint of Worcestershire sauce for extra flavor. Form the mixture into patties and grill until cooked through. Top each patty with creamy slices of avocado, crisp bacon, and a smear of tangy mayo. Serve on a whole wheat bun with a side of sweet potato fries for a satisfying and nutritious meal.

4. Veggie Black Bean Burger

Vegetarians and veggie lovers rejoice – the black bean burger is here to steal the spotlight. Mash cooked black beans with sautéed onions, garlic, and a medley of spices for a flavorful and protein-packed patty. Form the mixture into patties and cook on the grill or in a skillet until crispy on the outside and tender on the inside. Top with melted pepper jack cheese, sliced jalapeños, and a dollop of creamy guacamole for a spicy kick. Serve on a toasted whole grain bun with a side of crispy coleslaw for a satisfying meatless meal.

5. Hawaiian Teriyaki Burger

Transport your taste buds to the tropical paradise of Hawaii with a tantalizing Hawaiian teriyaki burger. Marinate beef patties in a mixture of soy sauce, ginger, garlic, and brown sugar for a sweet and savory flavor infusion. Grill the patties until caramelized and juicy, then top with grilled pineapple slices and melted provolone cheese. Serve on a toasted Hawaiian bun with a drizzle of teriyaki sauce, crispy lettuce, and red onion slices for a taste of island paradise.

6. Mediterranean Lamb Burger

For a taste of the Mediterranean, try a succulent lamb burger infused with aromatic herbs and spices. Mix ground lamb with minced garlic, fresh mint, oregano, and a splash of lemon juice for a burst of flavor. Form the mixture into patties and grill until charred and cooked to your liking. Top with creamy tzatziki sauce, sliced cucumber, tomato, and crumbled feta cheese. Serve on a toasted ciabatta roll with a side of Greek salad for a Mediterranean-inspired feast.

Conclusion

From classic beef cheeseburgers to gourmet creations bursting with flavor, these cheeseburger recipes offer something for every palate and occasion. Whether you’re firing up the grill for a summer barbecue or craving a comforting meal on a cozy night in, these mouthwatering burgers are sure to satisfy your cravings and leave you craving more. So, gather your ingredients, fire up the grill, and get ready to indulge in a culinary adventure that’s as delicious as it is satisfying. Cheers to the perfect cheeseburger!

Cooking Chicken Casserole

Delicious Comfort: Cooking Chicken Casserole


Introduction

Chicken casserole is a classic comfort food dish that never fails to satisfy. With its hearty ingredients and rich flavors, it’s the perfect meal to warm you up on a chilly evening or to share with family and friends. In this guide, we’ll explore a simple yet delicious recipe for cooking chicken casserole that will have everyone coming back for seconds.

Ingredients

  • 2 lbs (about 900g) boneless, skinless chicken breasts, cubed
  • 1 onion, diced
  • 2 cloves garlic, minced
  • 2 carrots, sliced
  • 2 celery stalks, sliced
  • 1 cup (240ml) chicken broth
  • 1 cup (240ml) heavy cream
  • 1 cup (240ml) frozen peas
  • 1 cup (240ml) shredded cheddar cheese
  • 2 tablespoons olive oil
  • Salt and pepper to taste
  • 1 teaspoon dried thyme
  • 1 teaspoon dried rosemary
  • 1 teaspoon dried parsley
  • 1/2 teaspoon paprika

Instructions

  1. Preheat your oven to 375°F (190°C).

  2. In a large skillet, heat the olive oil over medium heat. Add the diced onion and minced garlic, and sauté until softened and fragrant, about 2-3 minutes.

  3. Add the cubed chicken to the skillet, and season with salt, pepper, dried thyme, dried rosemary, dried parsley, and paprika. Cook until the chicken is browned on all sides, about 5-7 minutes.

  4. Add the sliced carrots and celery to the skillet, and cook for an additional 2-3 minutes until slightly softened.

  5. Pour in the chicken broth and heavy cream, and stir to combine. Bring the mixture to a simmer, then reduce the heat and let it simmer gently for 5-7 minutes, until slightly thickened.

  6. Stir in the frozen peas and shredded cheddar cheese, and cook for another 2-3 minutes until the cheese is melted and the peas are heated through.

  7. Transfer the chicken mixture to a large casserole dish, and spread it out evenly.

  8. Cover the casserole dish with aluminum foil, and bake in the preheated oven for 25-30 minutes, until the chicken is cooked through and the sauce is bubbling.

  9. Remove the foil from the casserole dish, and switch the oven to broil. Broil the casserole for an additional 3-5 minutes, until the top is golden brown and crispy.

  10. Remove the chicken casserole from the oven, and let it cool for a few minutes before serving. Enjoy your delicious and comforting meal!

Conclusion

Cooking chicken casserole is a simple yet satisfying way to enjoy a hearty and flavorful meal. With its tender chicken, aromatic vegetables, and creamy sauce, this dish is sure to become a favorite in your household. Whether you’re cooking for a family dinner or meal prepping for the week ahead, chicken casserole is a versatile and delicious option that never disappoints.

How to gut and prepare animals for food

How to Gut and Prepare Animals for Food: A Step-by-Step Guide

How to Gut and Prepare Animals for Food: A Step-by-Step Guide

Gutting and preparing animals for food is a skill that has been passed down through generations and is essential for hunters, homesteaders, and anyone interested in sourcing their own food. Here’s a step-by-step guide to gutting and preparing animals for consumption:

1. Gather Your Tools

Before you begin, ensure you have all the necessary tools and equipment:

  • Sharp knife or boning knife
  • Gutting hook or gutting gloves (optional)
  • Cutting board
  • Clean water for rinsing
  • Coolers or refrigeration for storing meat

2. Properly Dispose of Waste

Choose a suitable location away from water sources and other food prep areas to gut the animal. This prevents contamination and ensures proper disposal of waste. Consider composting or burying the remains if possible.

3. Prepare the Animal

Lay the animal on its back or side, ensuring it is secure and stable. Use ropes or straps to keep it in place if necessary. Take care to avoid damaging the meat while handling the carcass.

4. Make the Initial Incision

Using a sharp knife, make a shallow incision from the base of the rib cage to the pelvic bone, being careful not to puncture the intestines or other organs. This allows you to access the internal cavity of the animal.

5. Remove the Internal Organs

Carefully reach into the cavity and gently pull out the internal organs, including the intestines, stomach, liver, and lungs. Be cautious not to puncture or rupture any organs, as this can contaminate the meat.

6. Rinse and Clean

Once the internal organs are removed, rinse the cavity thoroughly with clean water to remove any blood, debris, or remaining organ tissues. Use a hose or bucket to flush out the cavity, ensuring it is clean and free of contaminants.

7. Inspect the Meat

Inspect the meat for any signs of damage, spoilage, or contamination. Remove any visible blood clots, hair, or foreign objects from the surface of the meat. Trim away any bruised or discolored areas to ensure the quality of the meat.

8. Store the Meat Properly

After gutting and cleaning the animal, it’s essential to store the meat properly to prevent spoilage. Place the meat in coolers or refrigeration to keep it chilled until you’re ready to cook or process it further. If you’re unable to refrigerate the meat immediately, consider packing it in ice or using a portable cooler to keep it cold.

9. Cook and Enjoy

Once the meat is properly prepared and stored, you’re ready to cook and enjoy it! Whether you’re grilling, roasting, or stewing the meat, take pride in knowing that you’ve sourced and prepared your own food from start to finish.

10. Practice Food Safety

Throughout the gutting and preparation process, it’s essential to prioritize food safety and hygiene. Wash your hands and tools thoroughly with soap and water before and after handling the animal, and avoid cross-contamination with other food items.

By following these steps, you can safely and effectively gut and prepare animals for food, ensuring the quality and safety of the meat for consumption. Whether you’re a seasoned hunter or a novice homesteader, mastering this skill allows you to take control of your food supply and enjoy the rewards of self-sufficiency.

American Discovery Trail

A Coast To Coast American Walking Trail:

The American Discovery Trail (ADT) is a remarkable long-distance hiking and biking trail that spans the width of the United States, stretching approximately 6,800 miles (10,944 kilometers) from coast to coast. Established in 1989, the ADT traverses diverse landscapes, ecosystems, and terrain, offering adventurers the opportunity to experience the natural beauty and cultural heritage of America firsthand.

From the shores of the Pacific Ocean in California to the Atlantic coastline in Delaware, the American Discovery Trail winds its way through 15 states, connecting iconic landmarks, scenic vistas, and historic sites along the way. The trail passes through a variety of environments, including rugged mountains, rolling plains, dense forests, and picturesque farmland, showcasing the rich diversity of the American landscape.

The ADT is divided into two main routes: a northern route and a southern route, each offering its own unique attractions and challenges. While the northern route traverses states such as Montana, Idaho, and Ohio, passing through iconic destinations like Yellowstone National Park and the Great Smoky Mountains, the southern route takes travelers through states like Nevada, Kansas, and Kentucky, highlighting landmarks such as the Grand Canyon and the Ozark Mountains.

One of the defining features of the American Discovery Trail is its accessibility to a wide range of outdoor enthusiasts, including hikers, bikers, equestrians, and nature lovers of all ages and abilities. Whether you’re embarking on a thru-hike from coast to coast or exploring shorter segments of the trail closer to home, the ADT offers endless opportunities for adventure, recreation, and discovery.

In addition to its recreational value, the American Discovery Trail serves as a symbol of unity and connection, bringing together communities and individuals from all walks of life. Volunteers, trail organizations, and local residents play a vital role in maintaining and stewarding the trail, ensuring that it remains accessible and enjoyable for generations to come.

Whether you’re seeking an epic outdoor adventure, a scenic getaway, or a chance to connect with nature and history, the American Discovery Trail offers an unforgettable journey across the heartland of America. So lace up your hiking boots, saddle up your bike, or pack your backpack, and get ready to explore the wonders of the ADT – one step, pedal, or hoofprint at a time.

How to build a snare & trap small animals

Survival Skills: How to Build Snares and Traps for Small Animals

Introduction

In a survival situation, knowing how to procure food can be essential for your survival. Building snares and traps for small animals is a valuable skill that can help you secure a source of sustenance when other options are scarce. In this guide, we’ll explore the basics of building snares and traps for small animals, providing you with the knowledge you need to increase your chances of survival in the wilderness.

Understanding Snares and Traps

Before delving into the specifics of building snares and traps, it’s important to understand the principles behind them. Snares are designed to capture animals by noose or entanglement, while traps are mechanisms that immobilize or kill animals when triggered. Both snares and traps can be effective methods for catching small game such as rabbits, squirrels, and birds.

Choosing the Right Location

Selecting the right location for your snares and traps is crucial for maximizing your chances of success. Look for areas with signs of animal activity, such as game trails, burrows, or feeding areas. Additionally, consider factors such as camouflage and concealment to minimize the chances of your snares and traps being detected by wary prey.

Building a Simple Snare

One of the simplest and most effective types of snares is the basic snare loop. To build a basic snare, you’ll need a length of wire or cordage, a sturdy branch or stake, and a trigger mechanism. Form a small loop at one end of the wire and secure it to the branch or stake. Position the loop along a game trail or near a den entrance, and set the trigger mechanism so that it will release the loop when disturbed by an animal.

Constructing a Figure-4 Deadfall Trap

Another effective trapping method is the figure-4 deadfall trap, which relies on a weighted object to crush prey when triggered. To build a figure-4 deadfall trap, fashion three sticks into the shape of a figure-4, with the bait stick serving as the trigger. Prop up the weighted object (such as a large rock or log) with the figure-4 mechanism, ensuring that it will fall when the trigger stick is disturbed by an animal.

Ensuring Humane Capture

It’s important to prioritize humane capture when building snares and traps for small animals. Check your snares and traps frequently to minimize the suffering of captured animals, and use caution when handling live prey. Remember that trapping is a means of survival, and treat captured animals with respect and gratitude for the sustenance they provide.

Conclusion

Building snares and traps for small animals is a valuable skill that can enhance your ability to survive in the wilderness. By understanding the principles behind snares and traps, selecting the right location, and constructing effective devices, you can increase your chances of securing a vital source of food in a survival situation. Practice your trapping skills regularly and approach the task with patience and persistence, and you’ll be better prepared to thrive in the wild.

How to dig a water well

How To Dig A Water Well: A Step-by-Step Guide

Digging a water well is a crucial skill, especially for those living in rural areas or off-grid locations where access to municipal water is limited or nonexistent. While it may seem like a daunting task, with the right tools, knowledge, and preparation, you can successfully dig your own water well. Follow these steps to ensure a safe and efficient well-digging process:

1. Obtain Necessary Permits and Permissions

Before you begin digging, it’s essential to check with local authorities to obtain any required permits and permissions. Regulations regarding well digging vary by location, so make sure you’re in compliance with local laws and regulations.

2. Choose the Location

Selecting the right location for your well is critical. Look for an area where the ground is relatively flat and free from potential contaminants such as septic tanks or chemical storage areas. It’s also essential to consider the distance from sources of pollution, such as livestock areas or industrial sites.

3. Gather the Required Tools and Equipment

To dig a water well, you’ll need the following tools and equipment:

  • A sturdy shovel or spade
  • A digging bar or post hole digger
  • A well drilling rig or auger
  • PVC casing pipes
  • Gravel or coarse sand
  • Well screen
  • Hand pump or electric pump (optional)

Ensure that all your equipment is in good working condition before you begin.

4. Start Digging

Once you’ve chosen the location and gathered your tools, it’s time to start digging. Use a shovel or spade to dig a pilot hole approximately three to four feet deep. This will serve as the starting point for your well.

5. Use a Drilling Rig or Auger

After digging the pilot hole, you’ll need to use a well drilling rig or auger to continue digging deeper into the ground. Follow the manufacturer’s instructions for operating the drilling rig or auger safely.

6. Install PVC Casing Pipes

As you dig deeper, it’s crucial to install PVC casing pipes to prevent the well from collapsing. Lower the casing pipes into the hole as you dig, making sure to secure them in place with gravel or coarse sand.

7. Install the Well Screen

Once you’ve reached the desired depth, install the well screen at the bottom of the casing pipes. The well screen will prevent sediment and debris from entering the well while allowing water to flow freely.

8. Backfill the Well

After installing the well screen, backfill the well with gravel or coarse sand to provide additional support and stability.

9. Test the Well

Once the well is complete, it’s essential to test the water quality to ensure that it’s safe for consumption. You can do this by hiring a professional to conduct water quality tests or using DIY water testing kits.

10. Install a Pump (Optional)

If you plan to use the well for drinking water or irrigation, you’ll need to install a pump to extract water from the well. Choose a hand pump or electric pump based on your needs and budget.

Conclusion

Digging a water well may seem like a daunting task, but with proper planning, preparation, and the right tools, it’s entirely achievable. By following these steps, you can dig your own water well and enjoy access to clean, fresh water for years to come. Remember to prioritize safety at all times and consult with experts if you encounter any challenges along the way.

Developing Self Discipline

Developing Self-Discipline: A Path to Personal Mastery

Self-discipline is the cornerstone of success and personal growth, enabling individuals to overcome obstacles, stay focused on their goals, and achieve their fullest potential. Here are some key steps to developing self-discipline:

1. Set Clear Goals

Define your objectives clearly and precisely. Break them down into smaller, manageable tasks that you can work on consistently. Having a clear sense of direction will help you stay motivated and focused on what needs to be done.

2. Create a Routine

Establish a daily routine that incorporates time for work, rest, and personal development. Stick to a schedule and prioritize tasks based on their importance and urgency. Consistency is key to building self-discipline.

3. Practice Mindfulness

Be mindful of your thoughts, emotions, and actions. Notice when you’re tempted to procrastinate or engage in unproductive behaviors, and make a conscious effort to redirect your focus toward your goals.

4. Develop Healthy Habits

Cultivate habits that support your goals and well-being. This could include regular exercise, healthy eating, adequate sleep, and mindfulness practices such as meditation or journaling. Healthy habits lay the foundation for self-discipline.

5. Set Boundaries

Learn to say no to distractions, temptations, and activities that don’t align with your goals. Set boundaries to protect your time and energy, and prioritize tasks that move you closer to your objectives.

6. Embrace Discomfort

Understand that growth often requires stepping outside of your comfort zone. Embrace discomfort as a natural part of the learning process and push yourself to take on challenges that will help you grow and develop.

7. Practice Persistence

Stay committed to your goals, even when faced with setbacks or obstacles. Practice resilience and persistence, and view failures as opportunities to learn and improve. Keep moving forward, one step at a time.

8. Stay Accountable

Hold yourself accountable for your actions and progress toward your goals. Keep track of your successes and challenges, and seek support from friends, family, or mentors who can help keep you on track.

9. Reward Yourself

Celebrate your achievements and milestones along the way. Reward yourself for meeting your goals and sticking to your commitments, whether it’s with a small treat, a day off, or a moment of relaxation.

10. Reflect and Adjust

Regularly reflect on your progress and assess what’s working and what’s not. Be willing to adjust your approach as needed and make changes to your routine or goals as you learn and grow.

By following these steps and committing to a consistent practice of self-discipline, you can cultivate the mindset and habits needed to achieve success in all areas of your life. Remember that self-discipline is a skill that can be developed over time with patience, perseverance, and dedication.

Leadership Speeches – Become A Leader

Leadership Speeches: Inspiring Words to Become a Leader

My Favorite Leadership Speeches:

In the journey towards becoming a leader, one of the most valuable resources is the wisdom and inspiration shared by those who have walked the path before us. From renowned politicians and CEOs to visionary activists and cultural icons, the world is filled with powerful leaders who have left an indelible mark on history.

The YouTube playlist titled “Leadership Speeches” curated by TexasExes offers a captivating collection of speeches from some of the most influential leaders of our time. Through their words, these leaders impart timeless lessons on leadership, resilience, and the power of vision and conviction.

One of the standout speeches in the playlist is delivered by former U.S. President Barack Obama. In his address, President Obama reflects on the importance of leadership in times of uncertainty and adversity. He emphasizes the need for empathy, integrity, and humility in guiding the nation towards a brighter future.

Another powerful speech featured in the playlist is delivered by Malala Yousafzai, the youngest Nobel Peace Prize laureate and advocate for girls’ education. In her impassioned address, Malala shares her personal story of resilience and determination in the face of oppression and violence. She calls on leaders around the world to prioritize education and empower young people to create positive change in their communities.

The playlist also includes speeches from visionary business leaders such as Elon Musk and Sheryl Sandberg, who share insights into innovation, entrepreneurship, and the future of technology. Their words inspire aspiring leaders to think boldly, take risks, and embrace failure as a stepping stone towards success.

In addition to political and business leaders, the playlist features speeches from cultural icons such as Oprah Winfrey and Ellen DeGeneres, who use their platforms to advocate for social justice, equality, and compassion. Their words serve as a reminder that leadership is not just about achieving personal success, but about making a meaningful impact on the lives of others.

As viewers immerse themselves in the powerful speeches featured in the playlist, they are reminded of the transformative power of leadership to inspire change, ignite passion, and unite people towards a common purpose. Whether aspiring to lead in the boardroom, the classroom, or the community, these speeches offer invaluable lessons and inspiration to help individuals become the leaders they were meant to be.

How to throw a knife

Knife Throwing Tips & Tricks:

Throwing a knife can be a fun and challenging skill to learn, but it requires practice, patience, and safety precautions. Here’s a basic guide on how to throw a knife safely and effectively:

1. Choose the Right Knife

Select a throwing knife that is specifically designed for the purpose. Throwing knives typically have a balanced weight distribution and a sturdy construction to withstand impact. Avoid using regular knives or blades that are not intended for throwing, as they may be unsafe or damaged by the practice.

2. Find a Suitable Target

Choose a safe and appropriate target for your practice sessions. Outdoor targets made of soft wood, such as pine or cedar, are ideal for beginners. Ensure that your throwing area is clear of obstacles and bystanders, and never throw knives at living creatures or hard surfaces like concrete.

3. Adopt the Correct Stance

Stand facing the target with your feet shoulder-width apart. Position yourself at a distance from the target that feels comfortable for your throwing style and skill level. Keep your body relaxed and your non-throwing hand at your side or slightly extended for balance.

4. Grip the Knife Properly

Hold the knife with a firm but relaxed grip, using your dominant hand. Place your index finger along the spine of the knife and wrap your remaining fingers around the handle. Experiment with different grip positions to find what feels most comfortable and secure for you.

5. Practice the Throwing Motion

Start with a short throwing distance and gradually increase the distance as you become more confident. To throw the knife, bring your arm back behind your head in a smooth, controlled motion. Keep your wrist straight and your elbow slightly bent as you release the knife toward the target.

6. Aim for Rotation

Focus on achieving a consistent rotation of the knife as it travels through the air. The ideal rotation for a throwing knife is typically one full rotation (360 degrees) or slightly more, depending on the distance to the target. Experiment with your throwing technique to achieve the desired rotation.

7. Follow Through

After releasing the knife, maintain your follow-through by extending your arm toward the target and keeping your body balanced. Avoid jerking or twisting your arm during the release, as this can affect the accuracy and trajectory of the throw.

8. Practice, Practice, Practice

Like any skill, throwing knives requires practice and repetition to master. Start with short practice sessions and focus on developing consistent throwing technique and accuracy. Gradually increase the distance to the target and challenge yourself with different throwing angles and techniques.

9. Prioritize Safety

Always prioritize safety when throwing knives. Never throw knives in crowded or confined spaces, and never attempt risky or dangerous throws. Ensure that your practice area is clear of hazards, and never throw knives when under the influence of drugs or alcohol.

10. Seek Professional Instruction

Consider seeking instruction from experienced knife throwers or joining a local knife throwing club or organization. Professional guidance can help you learn proper technique, safety protocols, and advanced throwing skills in a supportive and educational environment.

Remember that knife throwing is a recreational activity and should be enjoyed responsibly. With patience, practice, and a focus on safety, you can develop your skills and become proficient at this challenging and rewarding pastime.

How to make fire

Discover Fire Making Tips & Tricks:

Making fire is a fundamental survival skill that has been practiced by humans for thousands of years. Here’s a basic guide on how to make fire using various methods:

1. Friction Method:

  • Bow Drill: Construct a bow using a curved stick and a length of cord. Create a spindle by sharpening one end of a straight stick. Place a flat piece of wood (the fireboard) on the ground and carve a small notch near the edge. Loop the cord around the spindle and wrap it around the bow. Place the spindle in the notch on the fireboard, apply downward pressure, and rapidly move the bow back and forth to rotate the spindle. The friction generated will create heat, eventually igniting the tinder.

  • Hand Drill: Similar to the bow drill, but instead of using a bow, rotate the spindle between your palms. Apply downward pressure and rapidly rotate the spindle against the fireboard to generate friction.

2. Flint and Steel Method:

  • Gather a piece of flint or other hard rock and a piece of high-carbon steel, such as a knife blade or a striker specifically designed for fire starting.
  • Hold the flint firmly in one hand and strike the steel against it at a sharp angle, directing the sparks onto a piece of char cloth or tinder fungus held in your other hand.
  • The impact of the steel against the flint will create sparks, which can be directed onto the tinder to ignite it.

3. Solar Method:

  • On a sunny day, focus sunlight through a convex lens, such as a magnifying glass or the lens of a camera, onto a piece of tinder.
  • Adjust the angle and distance of the lens until the concentrated sunlight forms a small, intense spot on the tinder, eventually causing it to smolder and ignite.

4. Chemical Reaction Method:

  • Combine two or more chemicals that react exothermically to produce heat and ignite tinder. Common chemical fire starters include potassium permanganate and glycerin, or a mixture of potassium chlorate and sugar.
  • Exercise caution when handling chemicals and follow safety instructions carefully to avoid accidents.

5. Electrical Method:

  • Use a battery and steel wool to create a short circuit, generating heat and igniting the steel wool. This method is particularly effective in dry conditions and can be a quick way to start a fire in an emergency.

Regardless of the method you choose, always exercise caution and follow safety guidelines when making fire, especially in wilderness or outdoor settings. Ensure you have proper tinder, kindling, and firewood ready before attempting to ignite a fire, and always have a means of extinguishing the fire readily available. Practice your fire-making skills regularly to maintain proficiency and confidence in various conditions.

How to purify water

Discover How To Clean Water For Drinking:

Purifying water is essential for ensuring its safety for drinking and other uses, especially in situations where clean water sources are unavailable or contaminated. Here are several methods for purifying water:

1. Boiling:

  • Bring the water to a rolling boil in a pot or kettle.
  • Allow the water to boil for at least one minute (or three minutes at higher altitudes) to kill bacteria, viruses, and parasites.
  • Let the water cool before drinking or storing.

2. Filtration:

  • Use a portable water filter or filtration system designed to remove contaminants such as bacteria, protozoa, and sediment.
  • Follow the manufacturer’s instructions for proper use and maintenance of the filter.
  • Replace filter cartridges or components as recommended to ensure effectiveness.

3. Chemical Treatment:

  • Chlorine or iodine tablets can be used to disinfect water and kill harmful microorganisms.
  • Follow the instructions on the product packaging for dosage and contact time.
  • Allow the treated water to stand for the specified period to ensure thorough disinfection.

4. Ultraviolet (UV) Light:

  • UV water purifiers use ultraviolet light to kill bacteria, viruses, and other pathogens present in water.
  • Place the UV light source in the water container and activate it according to the manufacturer’s instructions.
  • Ensure that the water is clear and free of sediment to allow the UV light to penetrate effectively.

5. Distillation:

  • Boil the water to produce steam, then collect and condense the steam to form purified water.
  • Distillation removes contaminants such as heavy metals, chemicals, and microbes by separating them from the water vapor.
  • This method requires specialized equipment, such as a distillation apparatus or solar still.

6. Reverse Osmosis:

  • Reverse osmosis systems use a semi-permeable membrane to remove contaminants from water through a process of filtration.
  • Water is forced through the membrane under pressure, leaving behind impurities and producing purified water.
  • Reverse osmosis systems are commonly used for home water treatment and can remove a wide range of contaminants.

7. Natural Methods:

  • In emergencies or outdoor settings, natural purification methods such as solar disinfection (SODIS) or using natural filtration materials like sand and gravel can help remove sediment and some contaminants from water.
  • These methods may not be as effective as other purification techniques but can provide a basic level of water treatment in certain situations.

When purifying water, it’s important to consider the specific contaminants present and the effectiveness of each purification method in removing them. Additionally, always ensure that containers and utensils used for collecting, storing, and treating water are clean and sanitized to prevent contamination. Regularly test treated water for safety to ensure that purification methods are working effectively.

How to become an EMT

Navigating the Path: How to Become an EMT

A Comprehensive Guide to Pursuing a Career in Emergency Medical Services

Welcome to “Navigating the Path: How to Become an EMT,” a comprehensive guide designed to help aspiring individuals embark on their journey towards a rewarding career in Emergency Medical Services (EMS). In this exploration, we’ll uncover the steps, requirements, and essential information needed to become an Emergency Medical Technician (EMT) and make a difference in the lives of others during times of crisis.

Chapter 1: Understanding the Role of an EMT

Begin your journey by gaining a clear understanding of the role and responsibilities of an EMT. In this chapter, we’ll explore the vital role that EMTs play in providing pre-hospital emergency care, stabilizing patients, and transporting them to medical facilities for further treatment.

Chapter 2: Prerequisites and Requirements

Discover the prerequisites and requirements for becoming an EMT. In this chapter, we’ll outline the educational requirements, age and health prerequisites, background checks, and other qualifications needed to pursue a career in EMS.

Chapter 3: EMT Training Programs

Explore the various EMT training programs available and choose the one that best suits your needs and career goals. In this chapter, we’ll discuss the different levels of EMT certification (EMT-Basic, EMT-Intermediate, EMT-Paramedic), as well as the structure, duration, and curriculum of EMT training programs offered by accredited institutions.

Chapter 4: EMT Certification and Licensure

Learn about the process of obtaining EMT certification and licensure in your state or region. In this chapter, we’ll explore the requirements for passing the National Registry of Emergency Medical Technicians (NREMT) exam, obtaining state licensure, and maintaining certification through continuing education and recertification requirements.

Chapter 5: Practical Skills and Clinical Experience

Develop the practical skills and clinical experience necessary to excel as an EMT in real-world situations. In this chapter, we’ll discuss the hands-on training, clinical rotations, and field internships that EMT students undergo to gain practical experience and confidence in delivering emergency medical care.

Chapter 6: Job Opportunities and Career Advancement

Explore the job opportunities and career advancement prospects available to certified EMTs. In this chapter, we’ll discuss the diverse employment settings where EMTs work, including ambulance services, fire departments, hospitals, and urgent care centers, as well as opportunities for career advancement, specialization, and further education in the field of EMS.

Chapter 7: Professional Development and Continuing Education

Commit to ongoing professional development and continuing education to stay current with advancements in EMS and enhance your skills as an EMT. In this chapter, we’ll explore opportunities for advanced training, specialty certifications, and professional organizations that offer resources and support for EMTs throughout their careers.

Conclusion:

As we conclude our journey through “Navigating the Path: How to Become an EMT,” may you feel empowered and inspired to pursue your dream of becoming an Emergency Medical Technician. By following the steps outlined in this guide, and with dedication, perseverance, and compassion, you can embark on a fulfilling career in EMS, where every day presents an opportunity to make a meaningful difference in the lives of those in need.

Learn CPR

Discover CPR Tutorials & Consider Getting Certified:

Learning CPR (Cardiopulmonary Resuscitation) is a valuable skill that can potentially save lives in emergency situations. Here’s a basic guide to learning CPR:

  1. Find a CPR Course: The first step in learning CPR is to find a certified CPR training course in your area. Many organizations offer CPR certification classes, including the American Red Cross, the American Heart Association, and local community centers. You can typically find courses for both healthcare professionals and laypersons.

  2. Choose the Right Course: Depending on your needs and interests, you can choose from different types of CPR courses. Basic CPR courses typically cover adult, child, and infant CPR techniques, as well as how to use an automated external defibrillator (AED). Advanced courses may include additional training in first aid, choking relief, and CPR for healthcare providers.

  3. Attend the Training: Once you’ve found a course that suits your needs, sign up and attend the training session. CPR courses typically combine hands-on practice with instructional videos, lectures, and demonstrations. Be prepared to actively participate in skill drills and scenarios to reinforce your learning.

  4. Learn the Steps: During the CPR training, you’ll learn the basic steps of CPR, which typically include:

    • Assessment: Check the scene for safety and assess the victim for responsiveness. Tap the person’s shoulder and shout, “Are you okay?”
    • Call for Help: If the victim is unresponsive, call for emergency medical assistance (911 or your local emergency number) immediately.
    • Check for Breathing: Tilt the victim’s head back, lift the chin, and look, listen, and feel for signs of breathing for no more than 10 seconds.
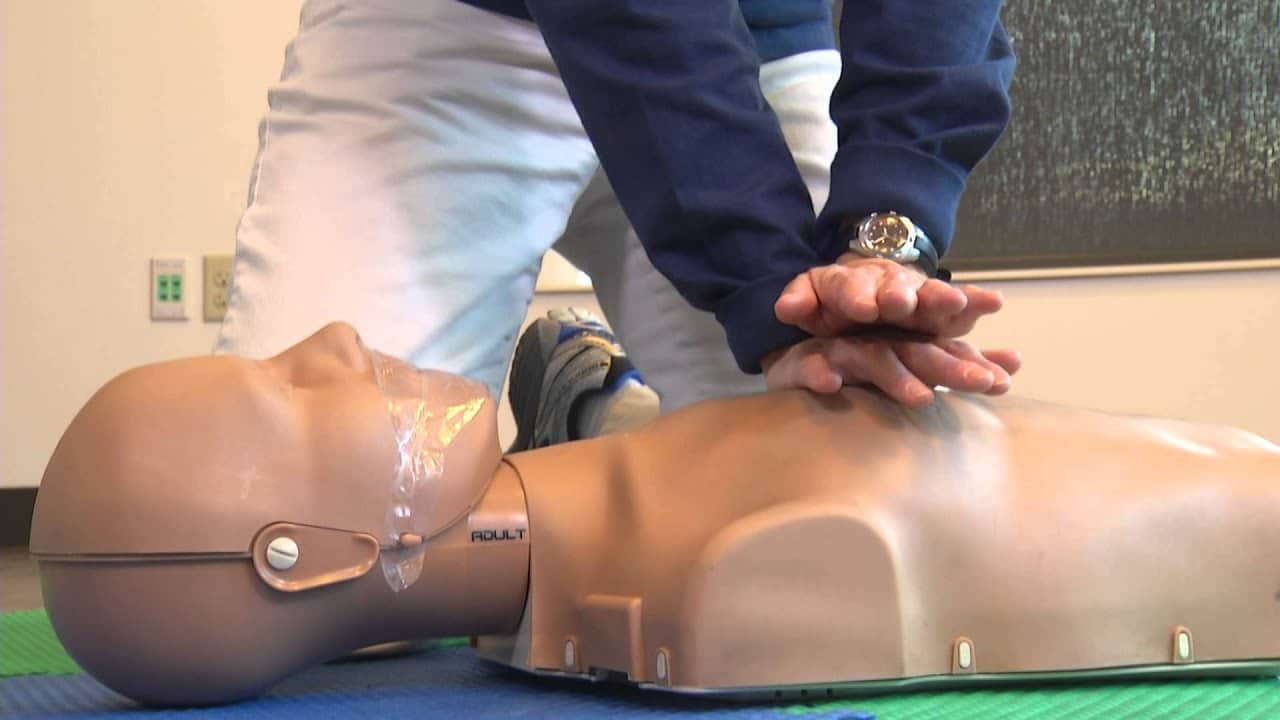
    • Perform Chest Compressions: If the victim is not breathing or only gasping, begin chest compressions by placing the heel of one hand on the center of the victim’s chest (between the nipples) and interlocking the other hand on top. Push hard and fast at a rate of about 100 to 120 compressions per minute, allowing the chest to fully recoil between compressions.
    • Give Rescue Breaths (if trained): If you’re trained in CPR with rescue breaths, give two breaths after every 30 compressions. Ensure proper head tilt and chin lift before giving breaths.
  5. Practice Regularly: CPR is a skill that requires practice to maintain proficiency. Even after completing a CPR course and obtaining certification, it’s essential to review and refresh your skills regularly. Consider attending refresher courses or participating in practice sessions to stay prepared for emergencies.

  6. Stay Informed: Stay informed about updates and changes in CPR guidelines and techniques. CPR protocols may evolve over time based on new research and evidence, so it’s essential to stay up-to-date with the latest recommendations from reputable organizations like the American Heart Association.

By learning CPR, you’ll be equipped with the knowledge and skills to respond effectively in life-threatening situations, potentially making a difference in someone’s survival outcome. Remember, every second counts in a cardiac emergency, so don’t hesitate to take action and administer CPR if needed.